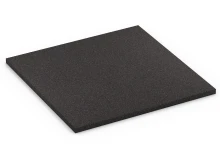
Stone Carpet Click Tile XT "Atlantic"
- /
-
Ready to ship
in approx. 3-4 weeks – production yet to start - €107.14 / 11.90 Piece / m²
- (1.35 kg / Piece)
EAN: 4251469368217 | Item no.: 6821
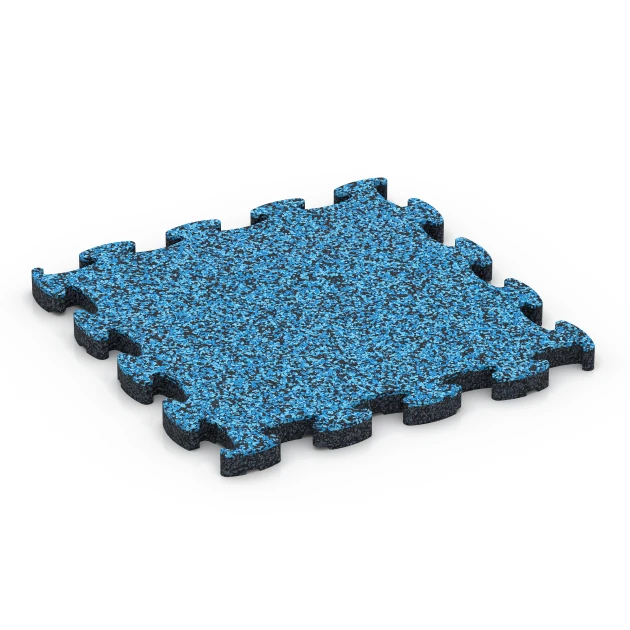
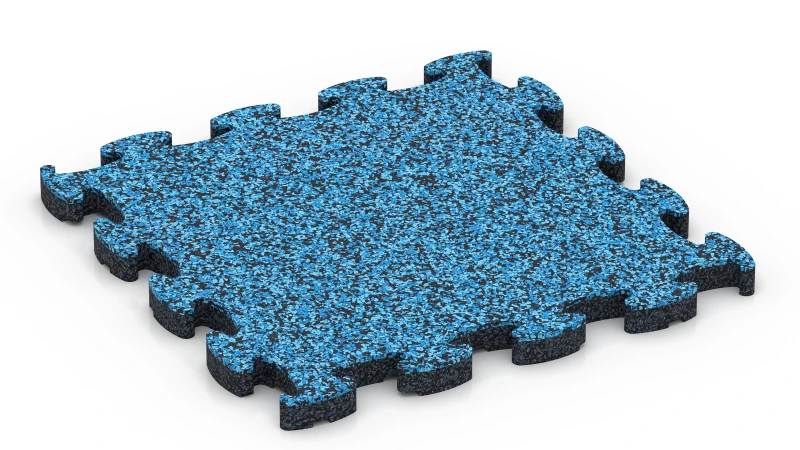
Stone Carpet Click Tile Type XT consists of small, precision-cut tiles, each 1.8 cm thick. The wearing layer is made from EPDM rubber granules coloured throughout, so it retains its colour as the surface wears, and has the appearance of stone carpet. The body beneath is made from ELT granules. The tiles form tight joints, so the finished surface looks as though it has been poured. On balconies, loggias and terraces, the covering is pleasantly resilient underfoot, hard-wearing and durable. The small format also makes awkward and narrow areas easy to cover.
What does the rubber flooring feel like?
The covering feels warm underfoot when you walk on it barefoot. Children can crawl and play directly on it. Even immediately after rain, the surface remains slip-resistant. If someone trips, the resilient covering cushions the fall. This provides comfort and a measure of safety for children, older people and pets. The covering muffles almost all the noise from footsteps, chairs being moved and rolling toys. Neighbours in the flat below will notice the difference too.
What are the tiles made from?
The tiles have two layers with different functions. The upper wearing layer comes into contact with hands and feet. It is made from newly manufactured EPDM rubber granules coloured throughout. This means the tiles retain their colour even as the surface wears over time. The body is made from rubber granules recycled from end-of-life tyres, known as ELT granules. It carries the weight and cushions impacts. Garden furniture therefore does not normally leave permanent indentations. The covering weighs around 16 kg per square metre. When first unpacked, the tiles may still smell of rubber. Outdoors, this smell soon fades.
Can I lay the flooring myself?
Yes, you do not need a tradesperson. The interlocking rubber tiles arrive ready to lay, with nothing to mix or apply. They are usually laid directly over an existing surface, such as ceramic tiles, waterproofing membranes, screed, concrete, timber boards or sheet metal. The substrate must be stable, reasonably level and able to support the covering over time. Existing ceramic tiles that are firmly fixed can stay in place. If they sound hollow when tapped, remove them first. There is no need to drill, glue or screw anything. The optimised jigsaw interlock joins each tile to its neighbours. This prevents the edges from lifting. The small format allows corners, narrow strips and areas around posts to be covered accurately. At the edges, cut the tiles with a jigsaw or circular saw. One tile can often provide two edge pieces. If you rent your home, you can take the covering with you when you move and lay it again in your new home.
How does it cope with rain, frost and sun?
Rain passes through the tiles. On an impermeable substrate, the water follows the slope to the drain through shallow drainage channels on the underside. This prevents puddles and lets the covering dry quickly. The covering does not replace waterproofing. Any existing waterproofing remains untouched beneath it. Frost does not damage the tiles, so they can remain in place throughout winter. In direct sunlight, the covering warms up. Light and mottled colours heat up less than dark colours. Sweep away leaves and crumbs with a broom, and rinse off dirt with water.
Can I order tiles cut to size?
Yes, for an extra charge. Draw the area using the laying planner on the WARCO website, then send the DXF file to WARCO. WARCO supplies the tiles cut to size and ready to lay. On site, they only need to be placed in the right order. The covering does not need a separate supporting structure. If you want to increase the build-up height, place suitable Type XX functional tiles underneath. They reduce impact sound further.


Discount
Product Highlights
Characteristics
Product Details – Material and Structure


Comparative values
A calibrated puzzle interlock without a bevelled edge is produced by cutting each rubber tile precisely to size from a larger blank. The blank is left to cure for several days before cutting.
Without a bevelled edge means that the tile edges are vertical rather than chamfered. The finished tile has only a minimal height tolerance.
In the usual pressing process, a rubber tile receives a bevelled edge, causing each joint to appear as a dark line across the surface. With vertical edges and minimal height tolerance, the tiles butt together accurately, leaving only a hairline joint. This hairline joint is visible in the laid surface only on close inspection, so the floor covering appears almost seamless.
Outdoor rubber tiles made from polyurethane-bound rubber granules are frost-resistant and suitable for use throughout the winter. Their porous structure absorbs precipitation and allows it to pass downwards; water remaining in the pores has space to expand when it freezes, while the rubber granules and polyurethane binder remain elastic at sub-zero temperatures. The sub-base must also be constructed to withstand frost.
On bound sub-bases, water flows beneath and between the tiles in the direction of the fall towards the drainage system. On chippings or crushed stone, it drains vertically through the construction. If water collects beneath the tiles, a frost-susceptible sub-base may rise and then settle again after thawing. The tiles themselves remain unaffected, but the surface may become more uneven.
For winter maintenance, use a snow shovel with a smooth edge and avoid catching the tile edges. Salt used in normal quantities to melt ice does not harm the rubber granules.
Suitable balcony flooring for outdoor use must be weather-resistant, frost-proof and water-permeable. Balcony tiles made from rubber granules meet these requirements and have a slip-resistant, elastic surface that is comfortable under bare feet.
Wood, artificial grass, ceramic and natural stone can also be used as balcony flooring. Wood requires regular maintenance, while artificial grass is very labour-intensive to clean. Ceramic and natural stone are durable materials, but their installation is more involved. If water penetrates an improperly installed build-up, frost can damage rigid tiles, joints and bonding.
Balcony tiles made from rubber granules are not damaged by frost. Rainwater and meltwater drain across the entire surface through the open-pored tiles and then into drainage channels on the underside, before running off in the direction of the fall. Their elasticity and water permeability prevent frost damage such as cracking, bursting or breaking.
The rubber tiles are placed on the existing substrate without being fixed to it and, depending on the system, connected using puzzle joints or connectors. The substrate must be load-bearing and sufficiently level, with an intact waterproofing layer and a fall towards the outlet.
From a thickness of 1.8 cm, the tiles are shock-absorbing and reduce the transmission of impact sound. They are easy to maintain, available in many colours, and can be lifted and individually replaced when required.
WARCO supplies prefabricated interlocking tiles for balconies and terraces. They are made from PU-bound rubber granules with an EPDM wearing layer. Once laid, each tile covers 28.9 × 28.9 cm and is 1.8 cm thick; including the interlocking projections, it measures 31.5 × 31.5 cm. The coloured EPDM wearing layer sits on a base of recycled tyre rubber granules (ELT). The EPDM granules are through-coloured. Nine shades are available, ranging from Dark Grey Granite through Travertine to Rattan Lounge. Travertine is mottled beige with dark flecks.
On a firm substrate, the tiles are laid loose without mortar or adhesive (dry-laid). On a balcony, they fit between the wall and the balustrade. Because they are neither glued nor screwed down, individual tiles can be lifted at any time. The tiles are calibrated and cut without chamfered edges. Their rounded jigsaw interlock creates an almost seamless surface that is water-permeable throughout and frost-proof. Their 1.8 cm thickness also allows them to fit beneath low door thresholds.
At the perimeter, the tiles are cut to size. Each edge strip must retain an interlocking edge so it can click into the last full row. Because each tile has interlocking edges on two opposite sides, it provides two usable edge strips for the click-together surface.
WARCO rubber patio tiles start at around €36 (about £31) per square metre. At that price, the tiles are 3 cm thick and measure 50 × 50 cm, so four tiles cover one square metre. All prices include VAT.
The cost of patio slabs varies by product range, thickness and surface. Slabs with a coloured EPDM surface are among the more expensive options, at up to around €110 (about £94) per square metre. You can find the price of each option on its product page in the online shop.
The price per square metre is for the tiles alone. On a firm base such as concrete, asphalt, concrete block paving or natural stone paving slabs, the tiles can be laid loose without mortar or adhesive (dry-laid), making installation a DIY job. If there is no firm base, you also need to allow for the cost of a sub-base, such as one built from gravel grids.
After installation, the visibility of joints between rubber tiles depends on the joint type, edge profile, tile format and colour design.
Tiles with a jigsaw interlock retain narrow joints. Square and rectangular tiles with straight edges produce a regular grid. Calibrated tiles with a cut jigsaw interlock form an almost seamless surface.
Unchamfered edges make the joint pattern less conspicuous, whereas chamfered and straight-cut edges accentuate it. In multi-coloured designs, fine joints recede visually and generally appear only as a slight shadow. With single-colour coverings, the joint pattern is more pronounced, depending on tile type. When walked on barefoot, a narrow joint between unchamfered edges is scarcely noticeable.
For the most visually uniform surface possible, calibrated tiles with a cut interlock and colour designs made from differently coloured EPDM granules are suitable.
Rubber granule mats of any thickness can be cut with a jigsaw or a circular saw. A circular saw is suited to straight cuts, while a jigsaw is suited to curved cuts and cut-outs. PU-bound rubber granules can be worked in much the same way as wood, provided both saws are guided steadily with an even feed rate.
For particularly thick rubber mats or large sections to be cut, a reciprocating saw or chainsaw may be easier to handle than a guided circular saw. Thick impact-absorbing surfacing tiles also do not require a special machine: a coarse-toothed wood saw blade or a rubber saw blade is suitable. A coarse tooth pattern and moderate speed keep frictional heat low, allowing fitness tiles and patio tiles made from rubber granules to be cut cleanly.
Installation of rubber tiles requires a load-bearing substrate designed to drain water. The tiles are water-permeable, so rainwater passing through them must infiltrate into the substrate or, alternatively, be discharged by a fall.
In central Europe, the suitable installation temperature is between 5 and 17 °C. Direct sunlight should be avoided, as it can cause tiles to heat up to differing degrees; throughout installation, all tiles should have an even temperature. Rain during installation does not harm the tiles, but soaked tiles must dry completely before installation.
General installation instructions must be followed, along with the requirements for the relevant product and installation system.
New rubber tiles may carry harmless release-agent residues from manufacture. Weathering washes these residues away; if required, they can be removed with water and a brush or with a pressure washer. The typical rubber smell of new tiles is harmless and reduces noticeably after a short time outdoors.
Rubber flooring tiles can be installed directly over concrete, screed, asphalt or tiled floors as a loose-laid covering, without an additional sub-base.
With no additional sub-base required, the substrate must still be load-bearing, clean and sufficiently level. Remove loose material, oil and other contamination before laying. Larger irregularities, depressions and changes in level must be levelled out so that the tiles lie stably and do not create obtrusive edges.
The starting point and laying direction depend on the shape of the area and the required pattern. In many cases, starting in the centre helps to align the pattern evenly and produce similar cuts at opposite edges. For other areas, a straight boundary may provide the appropriate starting point.
Lay the tiles according to the chosen layout and join them firmly. Depending on the product, this is done using puzzle joints, dovetail joints or separate connectors. Measure the edge tiles, cut them to fit and then insert them.
Bonding is generally not required. Small cut pieces, stair treads and very small areas may require bonding.
Patio tiles made from PU-bound rubber granules are loose laid on a bitumen membrane, roofing felt or flat-roof membranes: they are simply placed in position, without adhesive or screws. This keeps the waterproofing on a balcony, terrace, roof terrace, flat roof or carport intact and allows individual tiles to be lifted at any time. Damaged waterproofing must be repaired before installation.
For plastic flat-roof membranes, it must be established before installation whether they contain plasticiser; the membrane manufacturer or a roofing contractor can provide this information. Roofing felt and bitumen membranes contain no plasticiser, so the tiles may rest directly on them; EPDM flat-roof membranes are also plasticiser-free. PVC or FPO plastic membranes can contain plasticiser, which may migrate into the rubber tiles on direct contact and cause the membrane to become brittle over time. Where a plastic membrane contains plasticiser, a thin separation layer of polyester or glass fibres is placed between the membrane and the rubber-granule covering. Plasticiser migration does not harm the rubber tiles.
The water-permeable rubber-granule covering allows rainwater to pass through the tiles onto the waterproofing, where it follows the existing fall to the outlet. On most ranges, drainage channels on the underside of the tiles carry the water onwards. A fall of 1 to 2 % has proved effective. Before installation, check the waterproofing for irregularities or depressions where water may collect, and level these areas with accurately cut pieces of roofing felt during installation.
Outdoor rubber tiles should be cleared of leaves, soil and sand regularly.
Loose dirt can be swept away with a rubber broom or rinsed off with a hose. Rain also washes much of the dust and pollen away through water-permeable tiles.
Regular maintenance reduces the work required for more thorough cleaning.
For thorough outdoor cleaning, a pressure washer is suitable. The water jet loosens dirt from the textured surface and removes more persistent residues such as dog mess or food residue.
Where clean water is not sufficient, use either a neutral cleaner suitable for rubber or a mildly acidic cleaner. A specialist rubber cleaner is not required. Biodegradable Sonett WC Cleaner Mint is particularly suitable and has a pH value of around 5 to 6.
Apply the cleaner evenly, either neat or slightly diluted. After 10 to 15 minutes, work it in with a brush, then rinse the area thoroughly with clean water.
When brushing, use moderate pressure only. Excessive pressure can loosen granules from the bonded matrix.
Strongly alkaline cleaners, abrasive products and solvent-based cleaning products are unsuitable, as they can attack the surface of the rubber tiles.