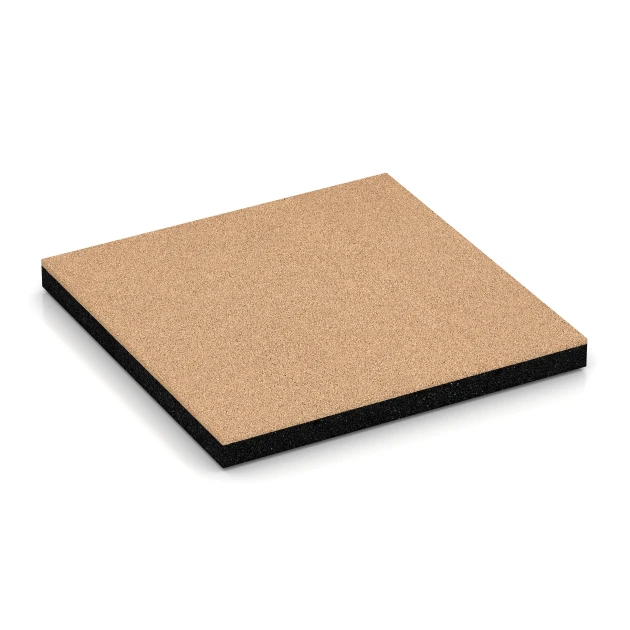
Playground Safety Tiles FF "Sand beige"
- /
-
Ready to ship
from stock in 1-3 days - €68.40 / 4 Piece / m²
- (7.30 kg / Piece)
EAN: 4251469362253 | Item no.: 6225
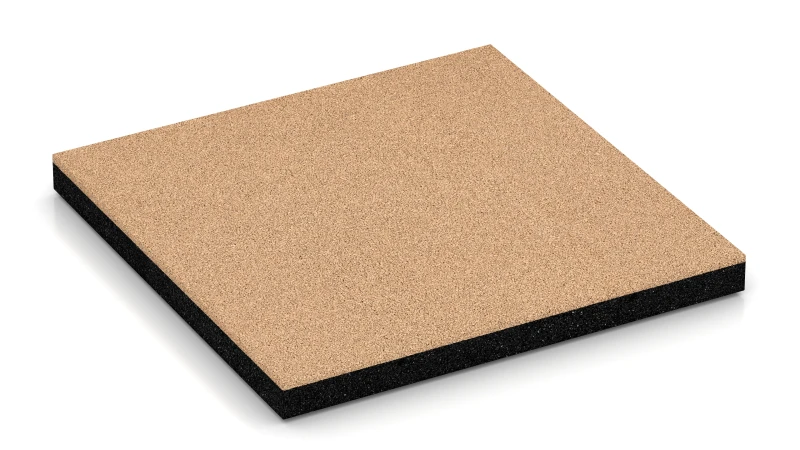
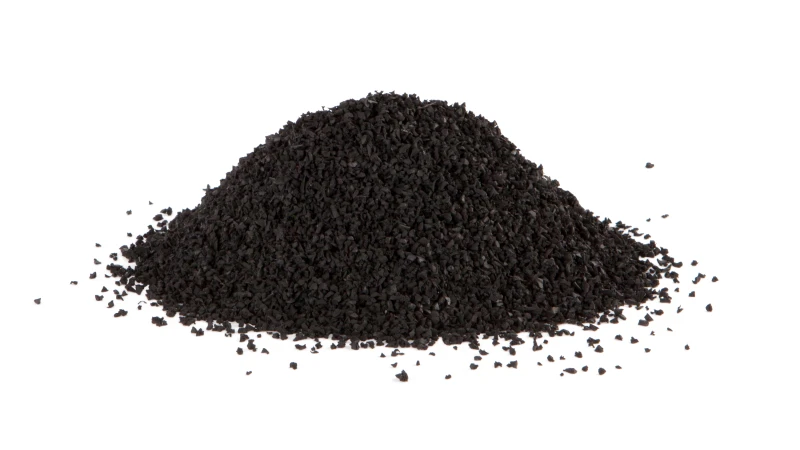
On playgrounds, Type FF Playground Safety Tiles cushion the impact if a child falls from a swing, slide or climbing frame. Each tile has two layers of rubber granules bonded with polyurethane. The top has a fine-grained, more densely compacted wearing layer. It is abrasion-resistant and slip-resistant. The main body beneath it is made from coarser granules and cushions the fall.
Which tile thickness is needed for each type of play equipment?
Type FF Playground Safety Tiles are available in several thicknesses. The height from which a child can fall from the play equipment is called the free height of fall. The greater this height, the thicker the tile needs to be. The equipment manufacturer usually states it in the product documentation. Each tile thickness is tested to BS EN 1177. The test establishes the height up to which the tile still cushions a fall sufficiently. This is the critical fall height. It must be at least as high as the free height of fall from the play equipment. Under a spring rocker, a thin tile is therefore enough. A thicker tile is needed under a climbing tower.
How are the tiles laid?
Playground Safety Tiles are laid using a half-bond installation, like bricks in a wall. Each row is offset from the next by half a tile width. The supplied plastic push-fit connectors are inserted into holes along two opposite edges. They connect each tile to the two adjacent tiles in the next row. To stop the rows moving apart in the direction of the connectors, the area should have a fixed edge restraint around its perimeter. When the area is set flush with surrounding grass, paving, concrete or asphalt, no extra edge restraint is usually needed. The tiles are cut with a circular saw or jigsaw.
What can the tiles be laid on?
Playground Safety Tiles can be laid on a firm base such as concrete, asphalt or block paving. An unbound sub-base is also suitable. This consists of properly compacted crushed stone (MOT Type 1) with a laying course of stone chippings. Every base must remain load-bearing and reasonably level over time. A plastic honeycomb grid filled with stone chippings has proved particularly effective as a load-bearing layer. The honeycomb grid prevents the stone chippings from moving sideways beneath the tiles over time. Rainwater drains through the tiles. It soaks into the ground on an unbound sub-base. On concrete or asphalt, it flows down the slope through shallow channels on the underside of the tiles.
How much care does the play area need?
Playground Safety Tiles are easy to look after. Leaves and sand can be swept away with a broom. Stubborn dirt can be removed with a pressure washer. A loose-fill surface of sand, gravel or wood chips gets dirty, becomes compacted during play and is gradually carried out of the play area. It therefore needs regular cleaning, loosening and topping up.


Discount
Product Highlights
Characteristics
Product Details – Material and Structure


Comparative values
The critical fall height of shock-absorbing playground surfacing is determined by a series of drop tests in accordance with BS EN 1177, not by a critical fall height calculator. A test headform fitted with an accelerometer is dropped from several heights onto points on the surfacing chosen in accordance with the standard. The critical fall height is the lowest drop height at which the impact produces a HIC value of 1000 or a peak acceleration (gmax) of 200 g. The least favourable test point determines the result.
That figure applies only to the surfacing construction tested under the conditions of the test. The test report therefore records the surfacing thickness, the substrate beneath it and the test conditions relevant to the result. On-site testing confirms whether the installed surfacing provides that level of shock absorption: the headform is dropped from a specified height at designated test points, and the readings are checked against the HIC and gmax limits.
The critical fall height is determined to BS EN 1177 in two procedures, one conducted in the laboratory and one carried out on site. The laboratory procedure establishes that value for a surfacing system. The on-site procedure checks at selected locations whether an installed area covers the free fall height of the equipment present. Test specimens with a combined area of at least one square metre are placed on a level, rigid concrete base. Loose-fill surfacing, such as impact-absorbing sand, gravel and woodchips, is installed at its intended depth. Safety tiles are laid so that the joints between tiles are included in the test.
Laboratory impact testing uses a hemispherical 4.6 kg test head, approximately 16 cm in diameter, fitted with an accelerometer, dropped from different heights onto the surfacing. For safety tiles, at least nine drops from at least four heights are made at separate locations 25 cm apart. For loose-fill surfacing, three impacts at each height are made on the same location. Testing is performed at 23 degrees Celsius, with a permitted variation of up to five degrees.
Laboratory results are assessed against the HIC value, which is the head injury criterion, and peak acceleration gmax. The critical fall height is the height at which either HIC 1000 or gmax 200 g is reached, with the lower value governing. It is established by interpolation of the measurement series. The test report gives the critical fall height in metres to two decimal places and states the test laboratory's measurement uncertainty. The result applies only to the tested construction, including tile type, thickness and connection, or, for multilayer systems, the complete layer sequence. The test substrate is the rigid laboratory base, not the site-built construction.
On-site testing verifies whether an installed impact-absorbing playground surfacing covers the free fall height of the equipment present. The test fall height must be at least the free fall height specified for the item of playground equipment under BS EN 1176. Measurements are taken at the least favourable locations, such as areas where the surfacing is worn or where its depth is lowest, and at further representative locations. The number of test locations depends on the size of the impact area, for which the standard specifies a minimum number. This procedure applies only to the locations tested and does not establish a critical fall height.
The thickness of playground safety mats and playground safety tiles must be selected according to their tested critical fall height, which must at least match the free fall height of the playground equipment. The greater the potential fall height, the thicker the mats or tiles need to be.
Thickness alone does not indicate the fall height a product can accommodate. Construction, density and elasticity also affect shock absorption.
As a broad guide for free fall height, the following thicknesses apply: - Up to 100 cm: 3 cm - Up to 150 cm: 5 cm - Up to 200 cm: 7 cm - Up to 300 cm: 10 cm
For shock absorption, the decisive value is always the critical fall height stated for the relevant product in its BS EN 1177 test report.
Playground safety mats and playground safety tiles can be used up to the critical fall height stated in the test report in accordance with BS EN 1177. This is the lowest height at which the HIC value reaches 1000 or the gmax acceleration reaches 200 g. Depending on the product version, the critical fall height is approximately 100 to 300 cm.
up to 100 cm: for example low playhouses, balance equipment
up to 150 cm: for example low climbing elements
up to 200 cm: for example climbing nets, climbing frames, multi-play units
up to 300 cm: for example tall climbing towers and large play structures
These equipment examples are provided for guidance only. The decisive factor is the free fall height of the specific item of playground equipment in accordance with BS EN 1176. The stated critical fall height must be at least equal to that free fall height.
Rubber tiles and mats made from rubber granules typically last 10 to 15 years under normal conditions, and often longer. They are intended for long-term indoor and outdoor use.
Their actual lifespan depends on the intensity of use, the location and weather conditions. On playgrounds, wear occurs mainly in heavily used areas, such as beneath swings and at slide exits. UV radiation and freeze-thaw cycles also contribute to the ageing of rubber granules.
Impact-absorbing surfacing should be inspected regularly for wear and signs of ageing. Where necessary, individual rubber tiles can be replaced without renewing the whole area, which makes maintenance easier and can extend the service life of the overall surface. The surface is easy to maintain.
Playground equipment with a free height of fall above 60 cm requires shock-absorbing surfacing under BS EN 1176. Where equipment involves forced movement, such as swings and slides, surfacing is required throughout the impact area regardless of the free height of fall. For low-level equipment, the requirement depends on both the free height of fall and the type of movement.
The free height of fall is the distance from the clearly intended body support to the impact surface below and must not exceed 3 m. For a platform, the body support is the platform surface; for a swing, the seat surface; and for a horizontal bar, the gripping surface. For climbing, the maximum grip height less 1 m applies. The critical fall height of the surfacing is determined by a series of drop tests to BS EN 1177 and must be at least equal to the equipment’s free height of fall.
Under BS EN 1176, grass and topsoil are acceptable up to a free height of fall of 100 cm, provided the surface is maintained, yielding and free from stones, roots, foundations and other hard objects. Once the ground is compacted, dried out or frozen, these conditions are no longer met. For equipment intended exclusively for domestic use, BS EN 71-8 applies instead of BS EN 1176, and shock-absorbing surfacing is required in a private garden as well.
WARCO rubber safety tiles start at around €36 (about £31) per square metre. This is the price for a 3 cm-thick tile measuring 50 × 50 cm; four tiles cover one square metre. The tile has been tested in accordance with BS EN 1177 and has a critical fall height of 110 cm. All prices include VAT.
Thicker tiles are tested for higher critical fall heights and generally cost more per square metre. For example, an 11 cm-thick tile with a tested critical fall height of 300 cm costs around €104 to €120 (about £88 to £100) per square metre, depending on colour. The tile thickness required depends on the free height of fall for the play equipment, as determined under BS EN 1176: the tile’s tested critical fall height must be at least as great as the equipment’s free height of fall. The price for each tile option appears on its product page in the online shop.
The sub-base, such as a plastic honeycomb grid, and rubber kerb edging cost extra. WARCO supplies both. WARCO does not provide a fitting service. Customers can lay the safety tiles and mats themselves or hire a local landscaping contractor. If a contractor lays the safety mats, the installation charge is additional to the tile price and varies with the work required on site.
Safety tiles must not be laid directly on sand, gravel or chippings; loose aggregate alone does not provide sufficient positional stability beneath elastic safety tiles.
To restrain this loose aggregate, plastic honeycomb grids are used. These are also known as gravel grids, grass grids or ground grids. The grids divide the area into many small cells, which hold the infill material laterally in place and protect it from shifting or being washed away. This creates a permanently stable, level and water-permeable sub-base for safety tiles.
Without these cells, sand, gravel and chippings remain mobile under load. Over time, the strongly profiled underside of the safety tiles can press into the loose aggregate, moving material from the centre of a tile towards its edges. Depressions then form in the bedding, which the elastic safety tile follows: it may settle in the centre and lift at the edges. This deformation is known as dishing or cupping.
To avoid such settlement, a level formation with adequate bearing capacity must first be prepared. Unsuitable or easily deformable soil layers must be excavated to the depth required by the local ground conditions and the intended load, particularly where loose-fill impact-attenuating sand is present. Where the ground has low bearing capacity or is cohesive or frost-susceptible, the excavation is backfilled in layers with suitable crushed stone and carefully compacted. Where the ground is stable and loading is low to moderate, an additional crushed-stone sub-base may not be necessary, depending on the installation conditions.
On the prepared formation, gravel grids are laid either directly or on a thin, levelled layer of chippings, according to the substrate. The thickness of the chippings layer depends on the selected construction and local conditions. The ground spikes on the underside of the grids are approximately four centimetres long; they engage with the underlying layer and support the anchoring of the grids. A general minimum chippings-layer thickness of 6 cm is not required.
The grid cells are then filled to their upper edge with suitable chippings or gravel. Crushed, angular aggregate is beneficial because it interlocks well. The infill material is carefully brushed into the cells, topped up where necessary and levelled flush with the grid surface. The safety tiles then rest across the filled honeycomb structure rather than only on the grid ribs, creating a stable and water-permeable sub-base.
On this completed grid, the safety tiles are laid and connected in accordance with the relevant installation instructions. Whether edge restraint is required depends on the product range, the connection system and the installation conditions. Some WARCO products are specifically approved for installation on a thin layer of chippings.
Playground safety tiles sit more evenly and remain stable for longer on gravel grids than on a loose grit bed. The honeycomb cells hold the aggregate in place, with the material contained within each individual cell. It can neither move sideways under load nor be washed out during heavy rain, so the tiled surface remains stable and safe over the years.
In a loose grit bed, the particles are broadly the same size and lack the fine material that would fill the voids. Even after compaction, the grit remains mobile. This movement is irrelevant beneath a rigid concrete slab, but an elastic playground safety tile or patio tile made from rubber granules does not spread loads evenly through the substrate. Over time, the grit may be pushed towards the tile edges. The rubber tile then loses support in the centre and sinks there, while displaced grit accumulates beneath the edges and lifts them. This pattern of damage is known as dishing.
Gravel grids are also sold as grass grids, gravel cells or plastic honeycomb grids. They turn a loose grit bed into a stable sub-base. When filling the cells, the aggregate is levelled exactly to the top edge. The contained material stays in place under load and in rain, leaving the tiled surface stable and safe. Filled grids can support up to 400 t/m², while the whole area remains water-permeable. Where the ground is permeable, a gradient and drainage are usually unnecessary.
On load-bearing ground subject to low loads, it is sufficient to remove the topsoil and lay the grids on a thin levelling layer of grit. Less excavation is required than for a conventional construction method. A sub-base of compacted crushed stone is only needed where the ground has limited load-bearing capacity, where the construction needs to be frost-proof, or where the area must carry higher loads. This limited amount of work is an argument in favour of gravel grids.
Plastic connectors, also known as connector pins or plastic connecting pins, are cylindrical plastic pins with a profiled surface. They fit into factory drilled holes along the sides of the tiles and connect rubber tiles in adjacent rows. Perpendicular to the connector axis, they prevent the tiles from shifting relative to one another. Along the connector axis, the tiles remain free to move.
The tiles are laid row by row in half bond. The plastic connectors are first inserted into the holes along one side of the tile being positioned. With the connectors leading, this tile is then pressed into the holes in the two adjoining tiles in the row already laid. The connectors are designed to fit tightly, so noticeable force during insertion and when pressing the tiles together is normal. If required, the connectors may be glued in place, which prevents the tiles from drifting apart along the connector axis.
Plastic connecting pins hold rubber tiles and shaped units made from rubber granules in accurate grid alignment. These plastic dowels are a widely used connection method and work in a similar way to wooden dowels, extending several centimetres into each of two neighbouring tiles. In a half-bond installation, each tile connects to two tiles in the preceding row and two in the row behind. Across the pin axis, the pins prevent lateral movement; along the axis, however, the tiles remain movable and can drift apart.
To limit this movement, a tiled area generally requires edge restraint. A level adjoining grass sward can provide this restraint. Alternatively, the plastic connecting pins can be glued in place, or the tiles can be bonded to the substrate. The pins do not resist the natural shrinkage of the tiles, so joints can still open and become wider over time.
Correct installation of safety tiles and safety mats requires the substrate, connection system, fall area, fall height and drainage to be matched to the intended use. This applies to outdoor impact-absorbing surfacing in gardens as well as on public playgrounds. Beneath play equipment, the tested critical fall height of the selected product and build-up must at least match the equipment’s free height of fall. The required dimensions of the fall area depend on the individual item of play equipment.
On concrete or asphalt, safety mats and safety tiles can be installed directly. Rainwater passes through the water-permeable surfacing to the sub-base, from which it is directed by a gradient towards a free edge or an outlet.
On grass or soil, direct installation is not appropriate. A loose fill of sand, chippings or gravel is also unsuitable as a substrate because it shifts over time. Once the turf has been removed, plastic honeycomb panels are laid on a thin bedding layer of chippings and filled with chippings up to their upper edge. The safety mats or safety tiles are then laid over them. Rainwater passes through the complete build-up and can infiltrate into the ground.
For higher loads or unfavourable ground conditions, an appropriately designed sub-base of compacted frost-resistant aggregate is also required beneath the laying course. Further installation depends on the connection system.
For safety mats with puzzle interlocking, the interlocking edge of one mat is pressed from above into the edge of the adjacent mat already in place. This stable connection generally requires neither bonding to the substrate nor edge restraint.
Safety tiles with plug-in connectors are laid in a half-bond pattern. They require edge restraint to prevent lateral movement. On a bound sub-base, bonding may be specified instead of edge restraint, depending on the installation situation.
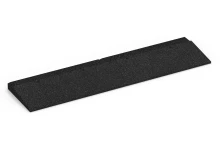
During installation, safety tiles should have a uniform temperature of no more than about 17 °C and should not be heated by direct sunlight. A rubber mallet helps to position the tiles, while a circular saw assists with cutting. Where the impact-absorbing surfacing ends within a paved area, a securely fixed transition ramp prevents trip hazards.