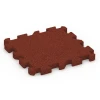
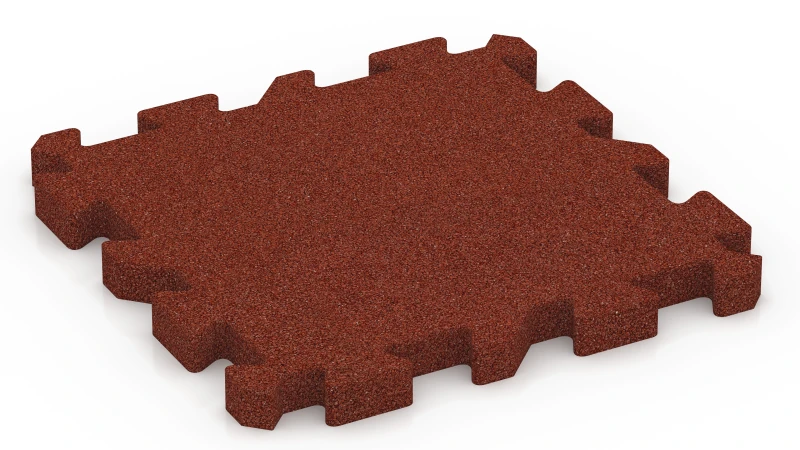
Rubber Pathway Tile UZ "Brick red"
- /
-
Ready to ship
in approx. 3-4 weeks – production yet to start - €66.40 / 4 Piece / m²
- (7.70 kg / Piece)
EAN: 4251469366244 | Item no.: 6624
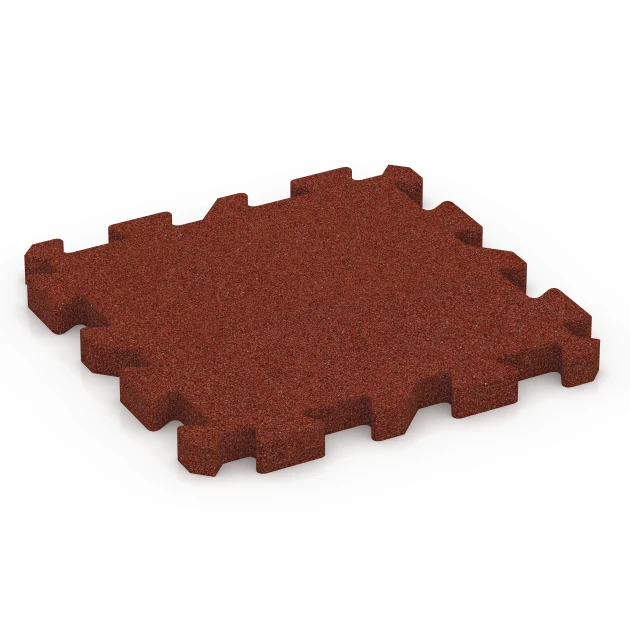
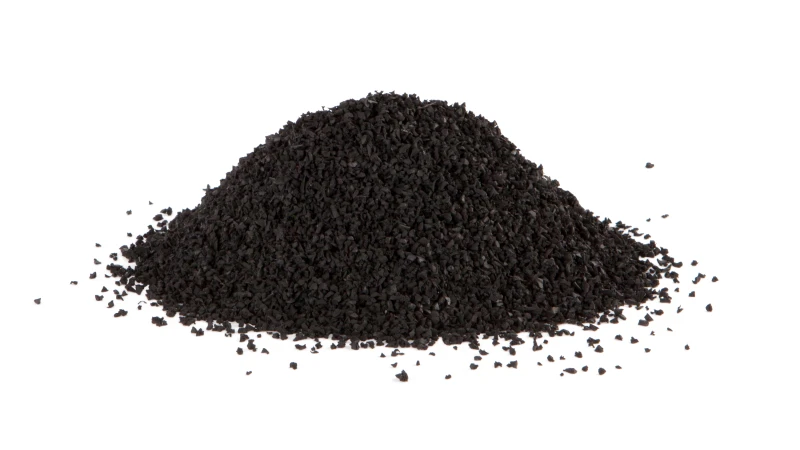
The rubber pathway tile is designed for outdoor walkways in gardens, residential settings and park areas. Manufactured from PU-bonded rubber granulate, it combines an open-pored surface with integrated drainage channels on the underside. The tiles interlock on all edges, forming a stable surface without additional fixing. Frost-resistant and weather-resistant, the covering can remain in place all year round and performs reliably in changing conditions.
Stable tile connection
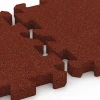
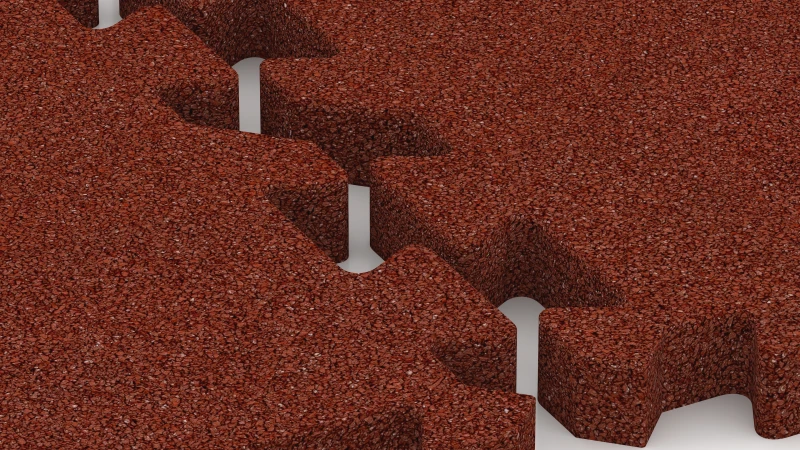
The integrated puzzle interlocking system connects the tiles securely without gluing or screwing. Tiles can be laid in a chequered or half-offset pattern and remain removable at any time. Individual tiles can be replaced without disturbing the surrounding area.
Easy installation
The tiles can be laid directly onto concrete, block paving, asphalt, a compacted gravel bed or plastic honeycomb grids. No complex substructure is required, which simplifies installation even on existing surfaces.
Permeable surface
The open-pored structure allows rainwater to seep through into the ground. On bound substrates, the drainage channels on the underside guide water along the natural gradient, helping to prevent surface water accumulation.
Year-round usable pathway
The surface offers slip resistance in both wet and dry conditions. Its impact-absorbing properties help reduce the risk of injury from falls. De-icing salt and abrasive agents can be used in winter, and snow can be cleared mechanically without affecting the surface.
Noise-reducing surface
The elastic structure absorbs footstep noise as well as rolling sounds from trolley cases or skateboards. This improves walking comfort, especially when wearing hard-soled shoes.
Vegetation-friendly
The tiles are suitable for installation under trees, as no invasive substructure is needed. The elastic structure adapts to slight ground movement and helps prevent uneven surfaces caused by root growth, while remaining permeable.
Maintenance-free
The pathway covering requires no ongoing maintenance. Cleaning is straightforward: sweep away debris or rinse with water, and for heavier soiling a pressure washer can be used.



Discount
Product Highlights
Characteristics
Product Details – Material and Structure

Comparative values
Outdoor rubber tiles made from polyurethane-bound rubber granules are frost-resistant and suitable for use throughout the winter. Their porous structure absorbs precipitation and allows it to pass downwards; water remaining in the pores has space to expand when it freezes, while the rubber granules and polyurethane binder remain elastic at sub-zero temperatures. The sub-base must also be constructed to withstand frost.
On bound sub-bases, water flows beneath and between the tiles in the direction of the fall towards the drainage system. On chippings or crushed stone, it drains vertically through the construction. If water collects beneath the tiles, a frost-susceptible sub-base may rise and then settle again after thawing. The tiles themselves remain unaffected, but the surface may become more uneven.
For winter maintenance, use a snow shovel with a smooth edge and avoid catching the tile edges. Salt used in normal quantities to melt ice does not harm the rubber granules.
Walkway slabs made from PU-bound rubber granules reduce footfall noise outdoors by preventing hard impact sounds from arising and by damping remaining vibrations.
On rigid surfaces, hard heels create short, forceful impacts that are heard as the familiar clacking sound. Wheeled suitcases, skateboards and transport trolleys can also produce rattling noise when small, hard wheels sink into joints, strike edges, or briefly lift over changes in level before hitting the surface again. Wider joints and greater differences in level make these impacts more pronounced.
Elastic walkway slabs and rubber block paving yield slightly under heels and wheels. With hard heels, this cushions the impact so that the typical clacking sound does not arise. Calibrated walkway slabs without chamfered edges create an almost joint-free walking surface, allowing small wheels to run quietly across the elastic rubber surface instead of producing the rattling noise associated with rigid surfacing.
On this elastic rubber surface, the internal damping of walkway slabs made from rubber granules further weakens remaining vibrations and reduces their transmission as structure-borne sound into the substrate. The slabs therefore act as walkable sound-insulating slabs for paths, passageways and courtyards. In hotel and residential developments, they are an effective means of significantly reducing noise levels.
Water-permeable walkway slabs are slip-resistant in the rain, provided that their pores remain clear and the surface is free from deposits. Water-permeable walkway slabs made from PU-bound rubber granules achieve slip resistance rating R10 and drain rainwater through their porous structure. Slip resistance is measured to BS EN 16165 on an inclined plane using test footwear and a lubricant; depending on the range, the mean angle of acceptance is between 12 and 17 degrees. For dry conditions, classification DS is also declared to BS EN 14041.
Slip-resistant is the appropriate description, as no surface provides grip in every condition. The granular, open-pore surface creates traction because the shoe sole moulds around the individual granules and deforms as the wearer steps down; most friction results from this deformation. The rubber tile also yields, increasing the contact area between the shoe sole and the surface.
In rain, water permeability also supports traction. An accredited institute measured more than 1,100 litres per square metre per hour to BS EN 12616. Rainwater therefore does not remain on the tile surface: it passes through the rubber tiles and drains away through channels on their underside. As long as the pores are clear, no continuous water film forms between the shoe sole and the surface.
Deposits on the surface behave differently from ordinary wetness. Damp leaves, snow, ice and a thin algae film after a mild winter can sit between the shoe sole and the surface, preventing the structure of the rubber tile from engaging. Keeping the area clear of leaves, sweeping regularly and removing oil or grease promptly helps to maintain traction over the years.
Paving slabs can be laid directly on grass if they are used individually as stepping stones. A continuous garden path, however, needs a sub-base.
For stepping stones, cut away the turf to make an opening the same size as each slab. Level and compact the soil beneath before laying the slab in place. Each slab then provides a firm, comfortable surface underfoot and can be lifted whenever needed. Without a sub-base, however, the soil beneath rubber paving slabs will move over time. The slabs will settle in places, leaving the path uneven.
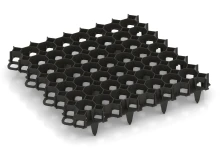
For a garden path made from rubber slabs, strip off the topsoil and prepare level ground firm enough to support the path. Lay a plastic honeycomb grid – sold as a gravel grid, a grass grid or a honeycomb gravel stabiliser – on the prepared ground. Fill its cells to the top with angular gravel, then lay the paving slabs on top. Built this way, the path stays level and free-draining.
Edge restraints provide additional lateral support for areas paved with walkway tiles made from PU-bound rubber granules. The tiles do not need to be bonded to the substrate or fixed with screws. Instead, they are laid loose on a level, load-bearing substrate with adequate drainage.
Depending on the tile system, walkway tiles interlock by means of puzzle joints or are held together with plastic connectors. An edge restraint gives the tiled area additional lateral support.
For small cut pieces at the edges, bonding them to adjacent tiles provides stability. Tiles are bonded together along their edges only in exceptional cases, such as in publicly accessible areas where there is an increased risk of vandalism or theft.
Rubber granule paving slabs are easy to clean and maintain in the garden with little routine effort. In everyday use, it is usually sufficient to sweep away leaves, soil and sand regularly, and to rinse the slabs occasionally with a garden hose. Fine dust and pollen are washed through the water-permeable paving slabs by rain.
Where the garden walkway has been built as a permeable construction, rainwater passes through the equally water-permeable sub-base into the ground.
If leaves, soil and other organic debris remain on the surface for a long time, a damp layer of dirt may form, particularly in shaded areas. Moss and green deposits may then develop on this damp layer. Weeds germinate where soil collects in open joints or along the edges of the walkway.
Stubborn dirt can be removed with a mild cleaner suitable for rubber or with a pressure washer. Moss and green deposits can be brushed away, while individual weeds can simply be pulled out.
An edge restraint is needed to prevent lateral movement at the free edges of an area laid on an unbound sub-base.
An edging kerb, also known as a kerbstone or edging stone, provides this restraint. It is particularly relevant for block paving, paving slabs and rubber paving tiles with interlocking connectors. Existing firm boundaries can also provide lateral restraint.
The edge restraint forms the lateral abutment for the surfacing. It absorbs horizontal forces arising from use and movements caused by temperature changes. This keeps the outer blocks or tiles in their intended position, stabilises the joint pattern and prevents movement at the edges.
No additional edge restraint is required where the surfacing is already permanently bounded by an adjoining concrete area, a wall or a fixed building edge.
Independently of its structural function, an edging kerb can provide a clean separation between paths or surfaced areas and grass, garden beds or sand areas. Typical applications include garden-bed edging and the perimeter of beach volleyball courts.
The edging kerb is installed upright on a concrete bed and secured laterally with a concrete haunch. Approximately 65% of its height is below finished ground level. A load-bearing, adequately drained substrate that is not susceptible to frost is required for a permanently stable edge.
Flexible edging kerbs are suitable for both straight and curved edges.
For most rubber tiles to stay level on stone chippings or gravel in the long term, the loose material must first be stabilised with plastic honeycomb grids. These are sold under various names, including gravel grids, grass grids and honeycomb gravel grids. In each case, the cells hold the chippings in place and stop them shifting.
Chippings are generally of a similar size, with no fine material to fill the gaps between them. They cannot therefore be compacted effectively and remain prone to movement. Walk across chippings or gravel and you can feel them shift underfoot and hear them crunch. Beneath a rigid concrete slab, that movement hardly matters. Beneath a rubber tile 2 to 5 cm thick, however, hollows develop in the bed and show through on the tile surface.
First, remove the topsoil and level the ground to the required formation level. Spread a thin layer of chippings over the prepared ground and screed it carefully to a flat finish. Lay the gravel grids on top and fill the cells flush with their upper edges. Use crushed chippings rather than rounded gravel, as their angular particles interlock much better. Then lay the rubber tiles on this bed. Where the ground has poor load-bearing capacity, or where the build-up needs to withstand frost, install and compact a sub-base beneath the laying course of chippings.
Certain WARCO ranges with a flat underside are approved for installation directly on a bed of chippings, without a gravel grid. These ranges always require a sub-base of compacted crushed stone (MOT Type 1). Over this, spread a 2 to 3 cm laying course of crushed sand and chippings graded 0/5, then screed it level and compact it with a plate compactor. Unlike chippings alone, this mix contains fine sand, which allows it to firm up.
The laying course must remain within that thickness range. Below 2 cm, it cannot be screeded and compacted properly; above 3 cm, too much loose material remains beneath the patio tiles. After compaction, check the surface with a three-metre straightedge: the gap beneath it should be no more than 0.5 cm anywhere.
Gravel stabilisation grids can be installed as a sub-base in three ways: directly on in-situ ground, on a grit laying course over the formation, or on a crushed-stone sub-base.
The grid cells are filled with crushed, angular grit. The cells are filled to the top, and the grit is levelled flush with their upper edges.
Where the ground has sufficient bearing capacity and is only lightly loaded, installation directly on in-situ ground is sufficient. Topsoil must first be removed, and the formation must be carefully prepared. The grids are laid directly on the natural ground, allowing the 4 cm ground spikes to penetrate the soil.
A thin grit layer can be laid over the formation to even out irregularities. The ground spikes extend through this grit layer and into the formation.
Where the ground has a low bearing capacity, protection from frost effects is required, or high loads are expected, a crushed-stone sub-base must first be installed and compacted. The ground spikes cannot penetrate the compacted crushed stone. A grit layer is therefore laid over the sub-base so that the spikes are fully embedded. This grit layer must be at least 6 cm thick, and the grids must sit firmly on it.
Gravel grids are also sold as grass grids or plastic cellular grids. The grids are set into the thin grit layer, which is about 2 to 5 cm thick when used to even out irregularities.
Rubber tiles can be laid directly over existing paving blocks or paving slabs where the surface is level, firm and stable. Installation over concrete block paving and old concrete slabs is possible.
The rubber tiles are loose-laid and, depending on the range, connected using interlocking puzzle edges or plastic connectors. Bonding to the substrate is not required.
Before installation, any sunken, tilted or loose paving blocks must be realigned. Pronounced differences in level and washed-out joints must also be remedied so that the rubber tiles are evenly supported and irregularities do not show through the floor covering. Narrow, filled and flush joints are not an issue.
For outdoor installation, rainwater must be able to drain away both from the surface of and beneath the floor covering.
Where paving has subsided or become distorted across a large area, it is best to lift the paving completely. The existing laying course is then checked and, where necessary, topped up or renewed, compacted and levelled. Plastic gravel grids are laid on the laying course of chippings and filled with chippings; they provide a permanently stable substrate for the rubber tiles.
The jigsaw interlock between rubber tiles is formed by alternating projections and matching recesses along each tile edge: the projections on one tile engage with the recesses in the adjoining tile, creating an edge profile similar to a jigsaw. Depending on the range, the projections are dovetail-shaped or rounded. In both cases, the head is wider than the neck, and the profile extends through the full tile thickness.
To lay the tiles, each tile is pressed down from above into the jigsaw interlock of the adjoining tiles already in place. The wider head prevents the tiles from being pulled apart across the surface; the interlock can be released only by lifting a tile vertically and holds the laid tiles together through their full thickness.
Where all four tile edges carry the same profile, the rubber tiles can be placed together from any side. Otherwise, the laying direction is specified by the profile. Bonding and perimeter edging are generally not required.
Grass and weeds can grow in the joints between rubber crumb tiles if the tiles are laid using plastic pins and the joints remain open down to the sub-base. The gaps can be closed during installation by bonding the edges of adjacent tiles together.
Even without bonding, weeds do not normally grow in the joints of tiles with a jigsaw interlock, whether visible or concealed, if the surface is used as intended and properly maintained. The joints are either too narrow for anything to grow in or do not reach the sub-base.
Whatever the joint type, keep the tiles and joints clean at all times to prevent unwanted growth from taking hold.