
Outdoor Gym Flooring FK "Atlantic"
- /
-
Ready to ship
in approx. 7-14 days – production already under way - €89.17 / 2.78 Piece / m²
- (8.93 kg / Piece)
EAN: 4251469371484 | Item no.: 7148
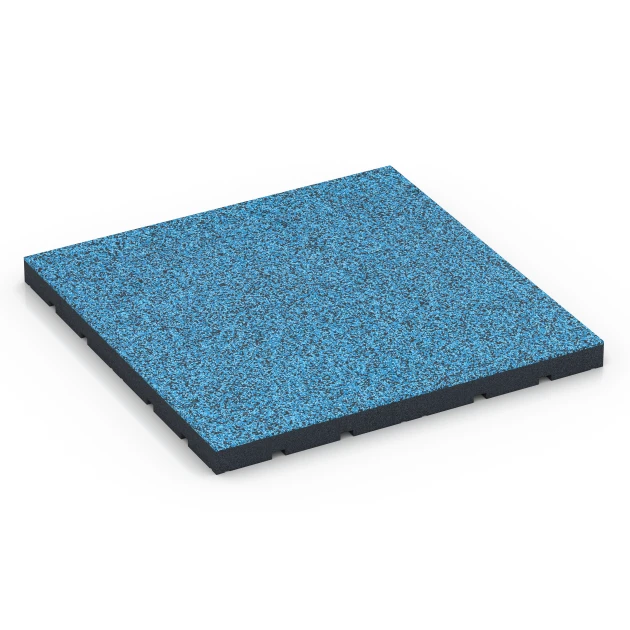
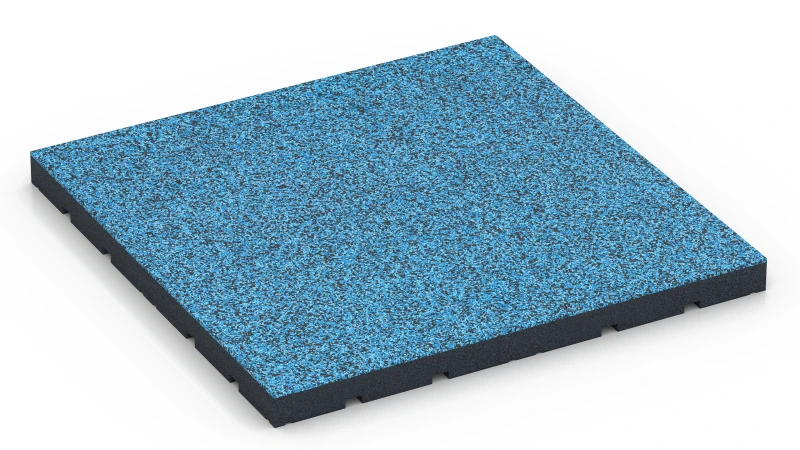
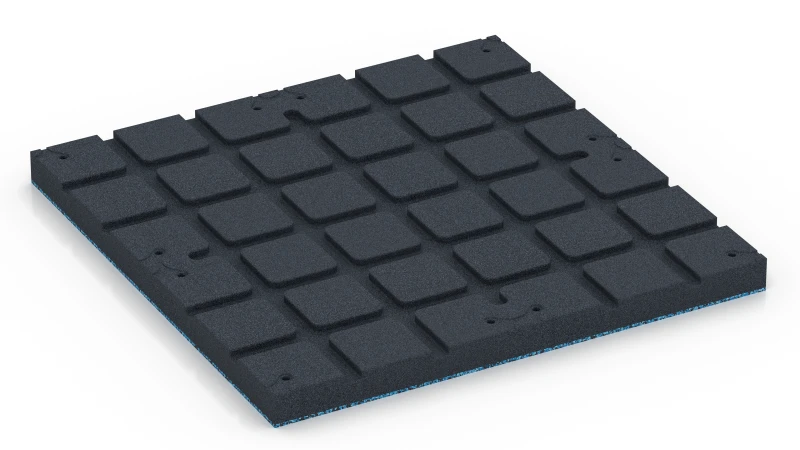
Outdoor Gym Flooring is designed for training outdoors. It has a through-coloured wearing layer made from EPDM rubber granules on an elastic base layer of SBR rubber granules. Connectors and joining clips link the tiles into one continuous surface. This creates a shock-absorbing rubber sports surface for outdoor fitness.
Who is outdoor gym flooring for?
Outdoor Gym Flooring turns a corner of the garden into a home gym and a terrace into an outdoor gym. Gym operators can move functional training, circuit training and classes outdoors. Local councils and clubs install the surface in outdoor fitness parks around permanently installed equipment. Personal trainers can use it to create an all-weather area for boot camps.
How does outdoor gym flooring absorb impact?
Outdoor Gym Flooring feels pleasantly resilient underfoot. The elastic base layer absorbs part of the impact from jumps and landings during box jumps, burpees and skipping. The surface reduces the impact when a dumbbell falls onto it. Hands and knees rest on an elastic surface during press-ups, planks and mobility exercises.
How does outdoor gym flooring stand up to sun, rain and wear?
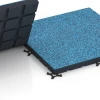
Outdoor Gym Flooring has an abrasion-resistant wearing layer that remains grippy in wet conditions. Rainwater runs away through drainage channels on the underside and follows the gradient of the underlying surface. The EPDM rubber granules are coloured throughout and UV-resistant. The surface therefore retains its colour even after years of intensive training.
How is outdoor gym flooring installed?
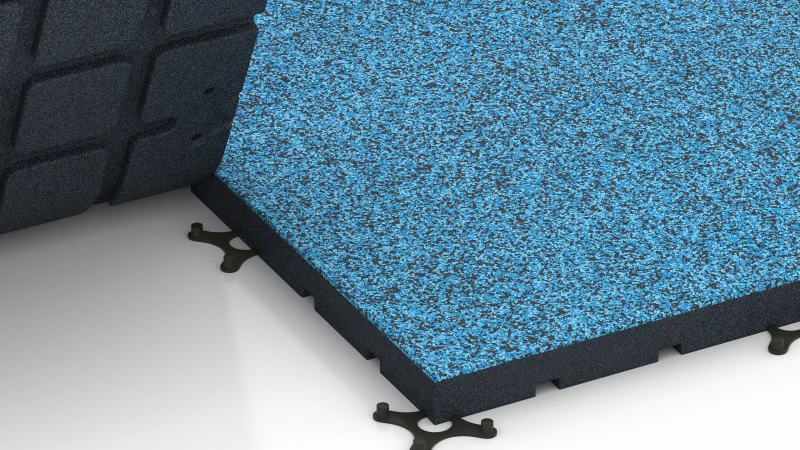
Outdoor Gym Flooring is laid on a sound, stable and largely level base such as concrete, asphalt or paving. On grass or gravel surfaces, plastic honeycomb grids filled with stone chippings form the sub-base. Connectors and joining clips keep the tiles together, including along an open edge. An edge restraint is therefore not usually needed. Edge tiles can be cut to size with a circular saw or jigsaw.
How do you clean outdoor gym flooring?
Outdoor Gym Flooring can be swept with a broom when leaves, sand or soil collect on it. More stubborn dirt can be rinsed away with a garden hose. A damp mop is often enough for outdoor training areas at gyms.


Discount
Product Highlights
Characteristics
Product Details – Material and Structure
Comparative values
The structured underside on rubber tiles and impact-absorbing mats provides drainage, reduces the area of contact with a wet substrate, and affects both shock absorption and dimensional stability.
With porous tiles, water passes through the surfacing across its full area. On a water-impermeable substrate, drainage channels direct the water along the fall; on a water-permeable sub-base, it drains into the sub-base.
Studs and drainage feet keep the tile body clear of the substrate. This prevents the tile from remaining continuously in wet conditions and allows it to dry more quickly.
The profile moulded into the underside creates additional space for elastic deformation. It therefore improves shock absorption and reduces internal stresses, which can arise from different temperatures or moisture conditions between the top surface and underside. The profile consequently contributes to the tile's dimensional stability. Wide bearing pads also reduce local pressure peaks.
The functions performed by the underside depend on the relevant tile range. Rubber mats for indoor areas often have a continuous, unstructured underside and lie in near-full contact with the substrate.
Outdoor rubber tiles made from polyurethane-bound rubber granules are frost-resistant and suitable for use throughout the winter. Their porous structure absorbs precipitation and allows it to pass downwards; water remaining in the pores has space to expand when it freezes, while the rubber granules and polyurethane binder remain elastic at sub-zero temperatures. The sub-base must also be constructed to withstand frost.
On bound sub-bases, water flows beneath and between the tiles in the direction of the fall towards the drainage system. On chippings or crushed stone, it drains vertically through the construction. If water collects beneath the tiles, a frost-susceptible sub-base may rise and then settle again after thawing. The tiles themselves remain unaffected, but the surface may become more uneven.
For winter maintenance, use a snow shovel with a smooth edge and avoid catching the tile edges. Salt used in normal quantities to melt ice does not harm the rubber granules.
WARCO rubber tiles and rubber mats made for outdoor use are weather-resistant and weatherproof. These floor coverings are made from rubber granules bound with a PU binder, so they do not rot or decay. These floor coverings are loose-laid, without adhesive or screws; this eliminates the risk of bond failure or delamination from the substrate, and installation does not damage the substrate.
The rubber tiles are porous and water-permeable: rainwater enters their structure and drains down through the tiles, rather than remaining on the surface. Beneath the tiles, water must be able to run off with the slope or drain directly into the substrate, allowing the surface to dry quickly. In frost, the rubber granules and PU binder remain elastic, while water in the pores has room to expand as it freezes. The tiles are therefore frost-resistant and do not crack or break in frost. Sun and weathering mainly affect the colour tone. UV stabilisation slows the effect of UV radiation on the rubber tiles, but it does not keep the colour tone permanently unchanged.
An EPDM wear layer is through-coloured, colour-stable and UV-resistant. With recycled tyre rubber granules (ELT) and a pigmented PU binder, the colour tone can change over the years. ELT rubber itself ages at the surface under intense sunlight. With changes in moisture and temperature, rubber tiles expand slightly and contract again.
Rubber granule surfacing can heat up substantially in direct sunlight. Its surface temperature depends on colour, the duration and intensity of exposure, and conditions such as air temperature, wind and shading.
In unfavourable summer conditions, an unshaded black rubber surface can reach more than 60 °C. As heatwaves become more frequent as a result of climate change, this aspect is gaining importance. When the air temperature in the shade is already 40 °C or above, no outdoor surface covering should be expected to have a cooler surface after several hours of direct sunlight.
Dark surfaces absorb more solar radiation and usually heat up more than light or flecked options. Colour selection and shading should therefore be considered early for patio tiles used barefoot, surfaces around pool edges and impact-absorbing tiles.
A shade sail, awning or natural shade limits further heat gain and helps the surface to cool. How quickly the surface cools depends on wind, air temperature and the amount of heat absorbed beforehand. In intense sunlight, check that the surface is comfortable to walk on before going barefoot or playing.
Rubber gym floor coverings made from rubber granules can be used for cardio, classes, equipment-based training, functional training, HYROX, boxing, gymnastics, free-weight training and strength training.
Their suitability depends on the thickness, elasticity and shock absorption being matched to the intended use. For cardio, classes and permanently installed training equipment, gym tiles at least 1 cm thick are suitable under normal use. For dynamic exercises, higher loads or greater requirements for elasticity and shock absorption, tiles at least 2 cm thick are recommended.
In functional training and HYROX, the covering is subjected to running, jumping, moving weights and sled exercises. For jumps and intensive contact with the surface, it must absorb shocks effectively while providing a stable training surface. Pulling and pushing sleds requires a firm, abrasion-resistant and durable surface.
For boxing and gymnastics, rubber gym floor coverings are available with elasticity and shock absorption matched to the respective movement patterns. Under permanently installed strength equipment, compressive strength, slip resistance and stable support are the main considerations.
In free-weight areas, thicker tiles or multilayer systems are required. These cushion the impact of weights being set down or dropped, distribute loads, reduce peak loads and limit the transfer of vibrations.
Multilayer systems combine different properties within a single floor covering. A dense top layer provides a firm, abrasion-resistant training surface, while a more elastic, shock-absorbing layer beneath it improves impact and vibration absorption. Density, rubber granule particle size, compaction and shock absorption are selected for each layer according to its function.
Within a comparable construction, a thicker tile allows greater deformation, resulting in greater shock absorption. There is no single gym floor covering for every application: single-layer and multilayer systems can be matched to the type of training, equipment and weights, potential drop heights, intensity of use and building conditions.
Rubber flooring for exercise equipment in an outdoor gym can be made from PU-bound rubber granules. It is slip-resistant, shock-absorbing, weather-resistant and frost-resistant.
For outdoor use, porous, water-permeable gym tiles are used. Rainwater passes through the tiles across their entire area, while the surface provides stable footing when wet.
Thickness and construction depend on the intended types of training. For calisthenics, equipment training and functional training, a balance between stability and shock absorption is required. Tiles of about 3 cm are suitable for many of these applications.
As well as thickness, density and construction affect the properties of rubber flooring. For kettlebells, barbells and other heavy weights, thicker tiles or multilayer surfacing systems are appropriate.
Where impact-absorbing surfacing is required around training equipment, the critical fall height determined in accordance with BS EN 1177 must be at least equal to the required free height of fall.
Slip-resistant fitness tiles made from PU-bound rubber granules can be used as flooring beneath gym equipment. The tiles attenuate impacts, reduce noise and structure-borne sound, and protect the floor from abrasion and pressure marks.
To protect the floor, the tiles must be installed on a firm, level substrate. All equipment feet must bear evenly and must not rest on a tile joint. Any unevenness must be levelled before installation.
For cardio equipment, fitness tiles with a thickness of about 1 cm or more are used. Heavy strength stations, racks and weight benches require thicker tiles.
For small or narrow equipment feet, an additional metal plate spreads the point load across a larger area.
For dropped weights, a simple equipment mat is not sufficient. The low-frequency vibrations created by dropped weights require a thicker or multi-layered flooring system for the training area.
Installation of rubber tiles requires a load-bearing substrate designed to drain water. The tiles are water-permeable, so rainwater passing through them must infiltrate into the substrate or, alternatively, be discharged by a fall.
In central Europe, the suitable installation temperature is between 5 and 17 °C. Direct sunlight should be avoided, as it can cause tiles to heat up to differing degrees; throughout installation, all tiles should have an even temperature. Rain during installation does not harm the tiles, but soaked tiles must dry completely before installation.
General installation instructions must be followed, along with the requirements for the relevant product and installation system.
New rubber tiles may carry harmless release-agent residues from manufacture. Weathering washes these residues away; if required, they can be removed with water and a brush or with a pressure washer. The typical rubber smell of new tiles is harmless and reduces noticeably after a short time outdoors.
For most rubber tiles to stay level on stone chippings or gravel in the long term, the loose material must first be stabilised with plastic honeycomb grids. These are sold under various names, including gravel grids, grass grids and honeycomb gravel grids. In each case, the cells hold the chippings in place and stop them shifting.
Chippings are generally of a similar size, with no fine material to fill the gaps between them. They cannot therefore be compacted effectively and remain prone to movement. Walk across chippings or gravel and you can feel them shift underfoot and hear them crunch. Beneath a rigid concrete slab, that movement hardly matters. Beneath a rubber tile 2 to 5 cm thick, however, hollows develop in the bed and show through on the tile surface.
First, remove the topsoil and level the ground to the required formation level. Spread a thin layer of chippings over the prepared ground and screed it carefully to a flat finish. Lay the gravel grids on top and fill the cells flush with their upper edges. Use crushed chippings rather than rounded gravel, as their angular particles interlock much better. Then lay the rubber tiles on this bed. Where the ground has poor load-bearing capacity, or where the build-up needs to withstand frost, install and compact a sub-base beneath the laying course of chippings.
Certain WARCO ranges with a flat underside are approved for installation directly on a bed of chippings, without a gravel grid. These ranges always require a sub-base of compacted crushed stone (MOT Type 1). Over this, spread a 2 to 3 cm laying course of crushed sand and chippings graded 0/5, then screed it level and compact it with a plate compactor. Unlike chippings alone, this mix contains fine sand, which allows it to firm up.
The laying course must remain within that thickness range. Below 2 cm, it cannot be screeded and compacted properly; above 3 cm, too much loose material remains beneath the patio tiles. After compaction, check the surface with a three-metre straightedge: the gap beneath it should be no more than 0.5 cm anywhere.
Rubber flooring tiles can be installed directly over concrete, screed, asphalt or tiled floors as a loose-laid covering, without an additional sub-base.
With no additional sub-base required, the substrate must still be load-bearing, clean and sufficiently level. Remove loose material, oil and other contamination before laying. Larger irregularities, depressions and changes in level must be levelled out so that the tiles lie stably and do not create obtrusive edges.
The starting point and laying direction depend on the shape of the area and the required pattern. In many cases, starting in the centre helps to align the pattern evenly and produce similar cuts at opposite edges. For other areas, a straight boundary may provide the appropriate starting point.
Lay the tiles according to the chosen layout and join them firmly. Depending on the product, this is done using puzzle joints, dovetail joints or separate connectors. Measure the edge tiles, cut them to fit and then insert them.
Bonding is generally not required. Small cut pieces, stair treads and very small areas may require bonding.
Plastic connectors, also known as connector pins or plastic connecting pins, are cylindrical plastic pins with a profiled surface. They fit into factory drilled holes along the sides of the tiles and connect rubber tiles in adjacent rows. Perpendicular to the connector axis, they prevent the tiles from shifting relative to one another. Along the connector axis, the tiles remain free to move.
The tiles are laid row by row in half bond. The plastic connectors are first inserted into the holes along one side of the tile being positioned. With the connectors leading, this tile is then pressed into the holes in the two adjoining tiles in the row already laid. The connectors are designed to fit tightly, so noticeable force during insertion and when pressing the tiles together is normal. If required, the connectors may be glued in place, which prevents the tiles from drifting apart along the connector axis.
Outdoor rubber tiles should be cleared of leaves, soil and sand regularly.
Loose dirt can be swept away with a rubber broom or rinsed off with a hose. Rain also washes much of the dust and pollen away through water-permeable tiles.
Regular maintenance reduces the work required for more thorough cleaning.
For thorough outdoor cleaning, a pressure washer is suitable. The water jet loosens dirt from the textured surface and removes more persistent residues such as dog mess or food residue.
Where clean water is not sufficient, use either a neutral cleaner suitable for rubber or a mildly acidic cleaner. A specialist rubber cleaner is not required. Biodegradable Sonett WC Cleaner Mint is particularly suitable and has a pH value of around 5 to 6.
Apply the cleaner evenly, either neat or slightly diluted. After 10 to 15 minutes, work it in with a brush, then rinse the area thoroughly with clean water.
When brushing, use moderate pressure only. Excessive pressure can loosen granules from the bonded matrix.
Strongly alkaline cleaners, abrasive products and solvent-based cleaning products are unsuitable, as they can attack the surface of the rubber tiles.